About Kaltura Capture
Kaltura Capture is a desktop application that helps you record presentations and screencast using any combination of voice, webcam video, screen action, and presentation slides. You can then upload and manage your recordings alongside other Kaltura content in My Media and Media Gallery within bCourses.
Installing Kaltura Capture
- Go to My Media in your bCourses site. (If you don’t see My Media, follow the instructions in How do I add My Media or Media Gallery to My bCourses Site?).
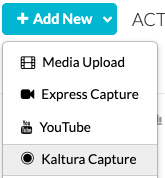
- Click +Add New. (Note: if you don't see the +Add New button, you may have to make your browser window larger.)
- From the drop down menu, choose Kaltura Capture.
You will be presented with a page providing links for downloading software - Click on Download for Windows or Download for Mac and then follow the instructions appropriate to your platform in Kaltura Capture-- Installing and Launching the Application. (For additional help installing Kaltura Capture, watch How to Install the Kaltura Capture Application.)
Note: If you encounter a permissions error while installing Kaltura Capture, contact your department's IT professional/administrator or the ITCS Service Desk for support.
Recording with Kaltura Capture
- Go to My Media in your bCourses site.
- Click +Add New. (Note: if you don't see the +Add New button, you may have to make your browser window larger.)
- From the drop down menu, choose Kaltura Capture.
- If prompted to "Open KalturaCapture?", select "Open KalturaCapture".
Kaltura Capture lets you record video and audio from multiple sources. To select sources, in the "Kaltura Capture" window, click each of the three drop-down menus and choose the cameras, screens, or microphones you wish to record:
Note: Kaltura Capture has a maximum recording time of two hours. If you are recording and reach the two-hour mark, Kaltura Capture will end the recording.
For more detailed instructions, please see our DLS Kaltura How-To and Best Practices Guide and the vendor's Kaltura Capture User Guide.