About Kaltura Capture
Kaltura Capture is a desktop application that allows you to record presentations and screencast using any combination of voice, webcam video, screen share, and presentation slides. You can then upload and manage your recordings alongside other Kaltura content in My Media within bCourses or MediaSpace.
Note for instructors: It is not required that you use Kaltura Capture; it is simply one option for recording asynchronous lecture content. If you are planning to record both a video of yourself and your screen, be aware that content captured using Kaltura Capture may have playback issues (poor synchronization) for longer recordings, so we recommend this tool only for shorter clips, less than 10 or 15 minutes. It is best practice to keep clips short (6 minutes is ideal). Refer to our Best Practices Guide for tips and best practices for using Kaltura Capture.
Installing Kaltura Capture
- Go to My Media in your bCourses site or MediaSpace. (If you do not see My Media in your bCourses site; if you are an instructor, follow the instructions in How do I add My Media or Media Gallery to my bCourses Site?. If you are a student, your instructor may have disabled My Media for that specific site. Try using a different bCourses site or MediaSpace).
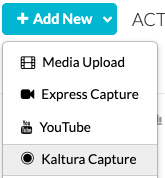
- Click +Add New. (Note: if you don't see the +Add New button, expand your browser window.)
- From the dropdown menu, choose Kaltura Capture.
You will be presented with a page providing links for downloading software.
4. Click on Download for Windows or Download for Mac and then follow the instructions appropriate to your platform in Kaltura Capture-- Installing and Launching the Application. (For additional help installing Kaltura Capture, watch How to Install the Kaltura Capture Application.)
Note: If you encounter a permissions error while installing Kaltura Capture, contact your department's IT professional/administrator or the ITCS Service Desk for support.
Accessing Kaltura Capture
- Go to My Media in your bCourses site or MediaSpace.
- Click +Add New. (Note: if you don't see the +Add New button, expand your browser window.)
- From the drop down menu, choose Kaltura Capture.
- If prompted to "Open KalturaCapture?", select "Open KalturaCapture."
- When asked to give access to the microphone, click "OK."
- When asked to give access to the camera, click "OK."
Note: If you are running Mac OS Catalina (10.15), you will need to give permission for screen recording in your Preferences; please see Control access to screen recording on Mac for instructions.
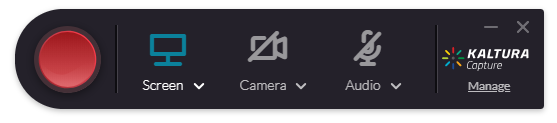
When Kaltura Capture is open, you will see the Recording Controls below appear on your screen.
Adjusting Recording Settings
Recording quality settings
1. From the recording bar, click the Manage link (on the right hand side). The Kaltura Capture window will appear.
2. Click the gear icon to open the Settings page.

3. Set Camera recording quality and Screen capture recording quality.
4. Click Save.
5. Make sure that Screen, Camera, and Audio are set appropriately, as described in the following section.
Screen capture settings
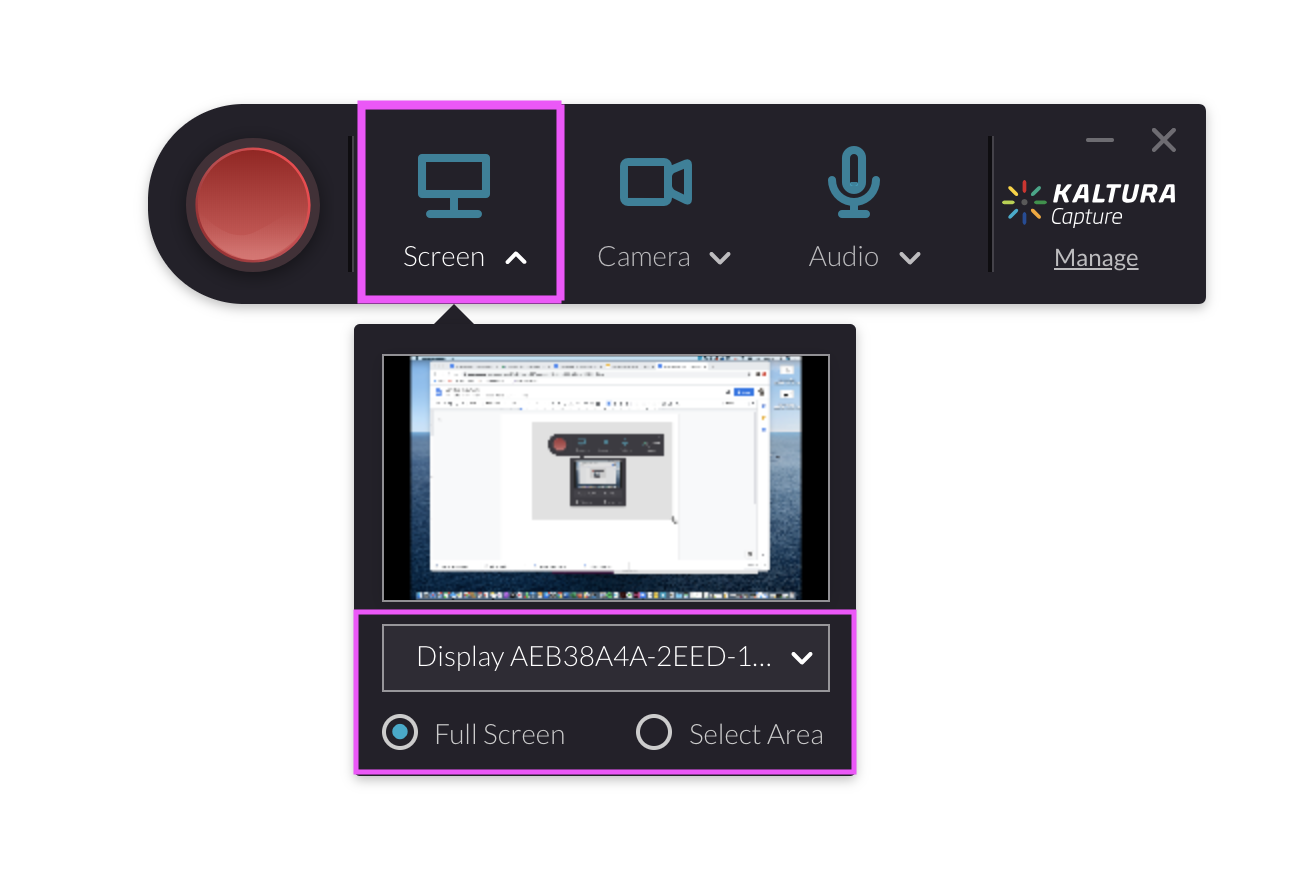
To select the screen to be recorded or to adjust the size of your screen capture:
1. Click the downward arrow next to "Screen" to choose the display you want to record.
2. Choose if you want to record the full screen or a selected area. For the selected area, drag the dotted white rectangle's edges and corners to fit around the section you wish to record. To move the entire selection, click and drag any point within the rectangle.
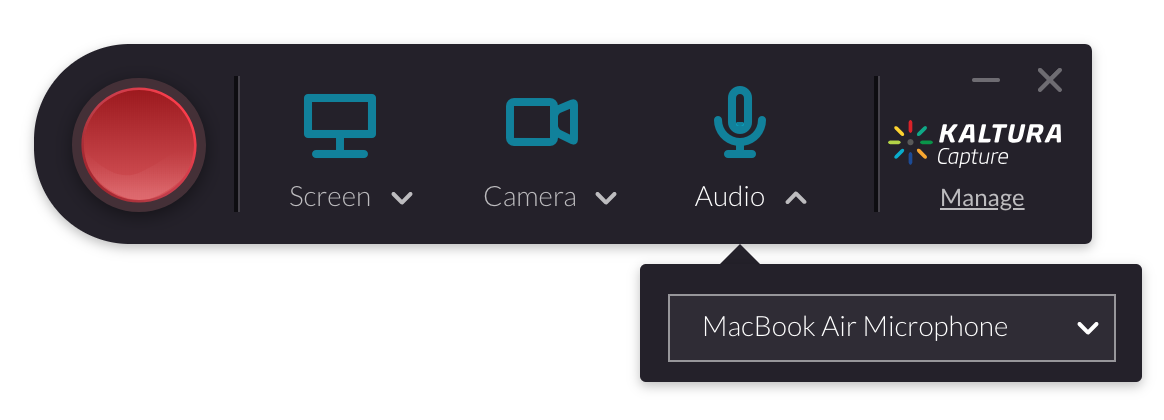
Changing or disabling input sources
Kaltura Capture lets you record video and audio from multiple sources. To select sources, in the Kaltura Capture window, click each of the three downward arrows and choose the cameras, screens, or microphones you wish to record.
To turn a source on or off, click the large blue icon corresponding to that source, and the icon will turn gray and have a slash going through it to indicate that it is turned off.
Hiding or Displaying the Kaltura Recording Toolbar
While recording, the recording toolbar can be minimized by clicking on the line at the top right corner of the toolbar. If the toolbar is minimized and you wish to get it back, click on the Kaltura app in your dock bar.
Recording with Kaltura Capture
- Click the red button to begin recording. A countdown should begin in the middle of the screen, and a window with a timer should appear in the bottom right corner of the screen. When the countdown ends and the timer begins running, the recording has started.
- To pause the recording, click the red button with the pause symbol on it. Resume the recording by clicking the red button again.
3. To end the recording, click the gray square next to the timer and select "Yes, Stop It" from the pop up menu.
While recording, please note:
- Kaltura Capture has a maximum recording time of two hours. If you are recording and reach the two-hour mark, Kaltura Capture will end the recording.
- If you are recording both Screen and Camera, be aware that, if you will be enabling viewer downloads, only the stream with the screen recording will be downloaded. As such, you will want to ensure that no critical information is in the Camera stream if viewers will be downloading your videos.
Annotating the screen capture while recording

1. To annotate your slides or screen capture demonstration while recording, click the pencil icon in the recording toolbar.

2. The annotations tool window will open and you can then choose the color, scale, method of annotation (pencil, arrows, or text), and placement. You can clear your annotations by clicking on the trashcan icon.
3. To open a whiteboard (a window that displays only white) click on the whiteboard icon next to the trashcan icon.
4. To close the annotation tool, click the blue pencil icon again.
Note to instructors: if annotating lectures from your desktop or laptop is proving to be difficult, a Wacom tablet, iPad, or Surface Laptop might help you meet the need of a virtual blackboard. Check out the Instructional Equipment Checkout services provided by RTL.
Saving and uploading to bCourses
After the recording has ended, a window will pop up with the options to replay the video, change the title, and add a description and tags to your recording.
The user has the option of deleting the recording, saving and uploading the recording, or saving the recording.
- Save allows you to save the video to your library on your device and possibly edit or re-record later.
- Save & Upload uploads to video to your bCourses My Media for editing and publishing to a course.
- In order to edit your video using the Kaltura video editor, you will need to Save & Upload the video file.
Deleting Kaltura Capture files
Once you have uploaded your videos to your My Media, there is no reason to keep them locally. To delete videos in your local Kaltura library:
- Open Kaltura Capture.
- Click Manage.
- Click the folder icon (above the settings gear icon) to view your Libray.
- Either use the Delete buttons to delete selected videos, or delete them all by clicking "Delete all uploaded files."
For more detailed instructions, please see the vendor's Kaltura Capture User Guide. For tips and best-practices for achieving the best possible recordings using Kaltura, please see our DLS Kaltura-How-To and Best Practices Guide.