|
This guide will walk you through how to connect a Windows 10 laptop to our projection system, and some tip and tricks in finding the settings as they are a little bit different than than Windows 7 or 8.1.
In this guide we are using a Surface Pro 3 (with Mini-Displayport) running Windows 10.
|
| |
|
Setup the Physical Connection
|
- Follow the instruction on the touch panel to turn on the system.
- Locate the HDMI or VGA adapter near the Black Box.
- Connect the cable to your laptop's display port
Note: Depending on the model of computer you may need an adapter to connect between your laptop and the HDMI/VGA cable. For more information about what adapter you will need, please check with the manufacturer.
|
| |
|
Toggle
|
|
In most cases the laptop will recognized the connection and display image to the projector/LCD monitor automatically. If this doesn't happen, we can manually trigger the connection by toggling the the setting.
- Press [WINDOWS] + [P] key at the same time, a menu will show up on the right side of the screen.
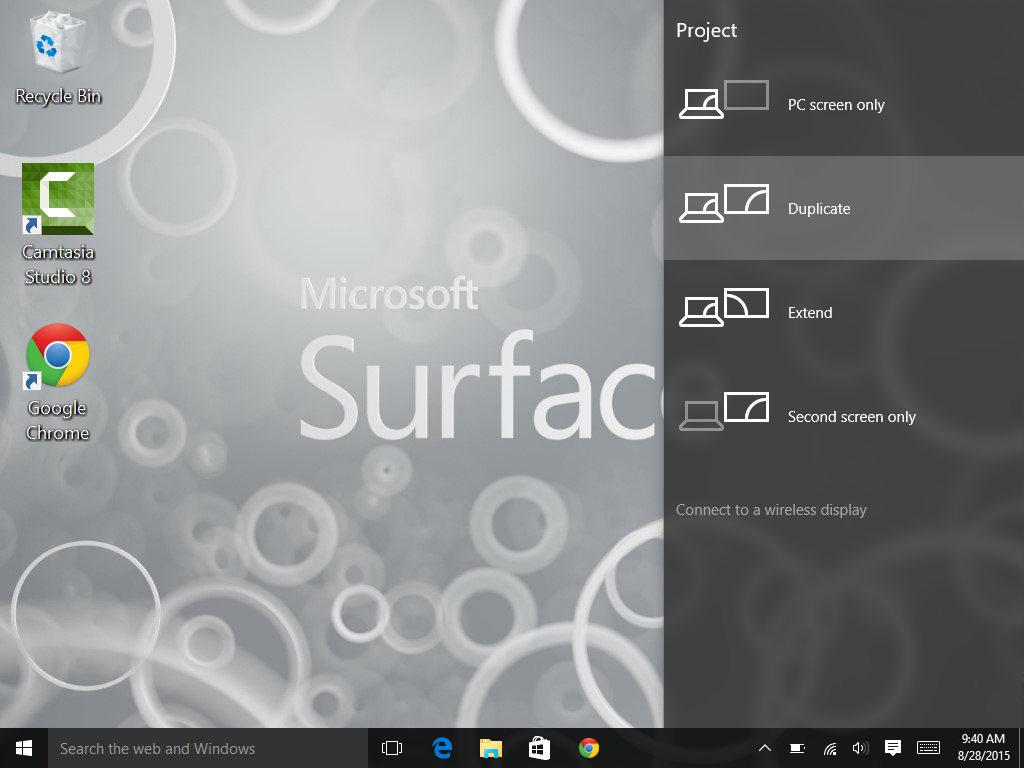 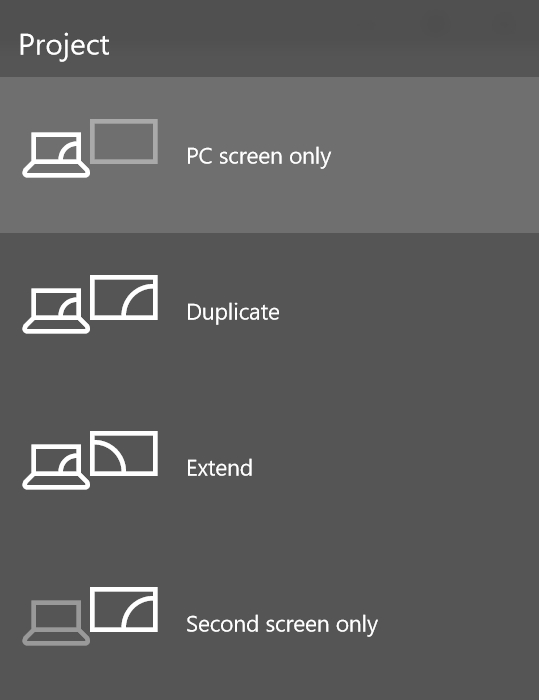
- Select the option you want to use to display the content:
- PC screen Only
- Duplicate (most commonly used selection; students see exactly what you see)
- Extend
- Second screen only
|
| |
|
Change Screen Resolution
|
|
Changing screen resolution can help with some display issue such shrinking or blurry image.
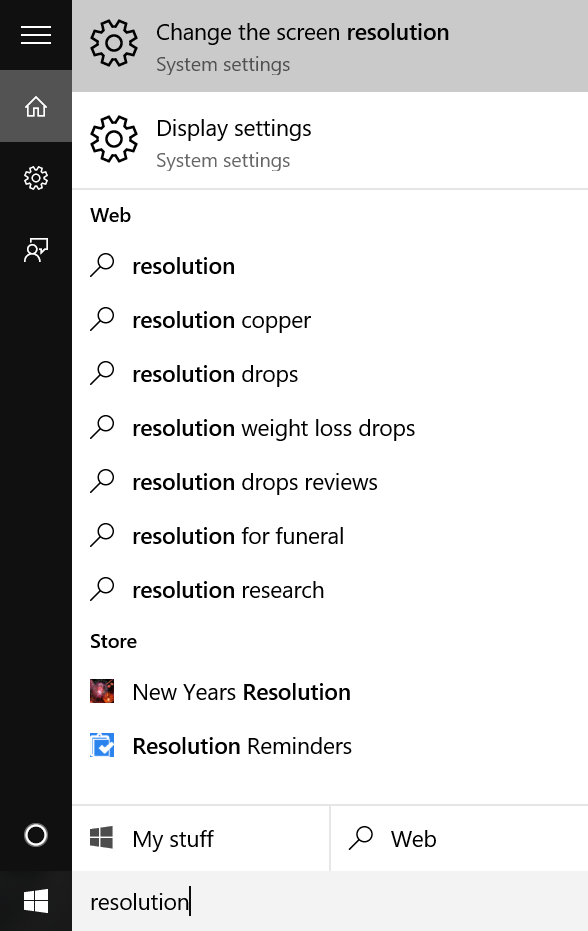
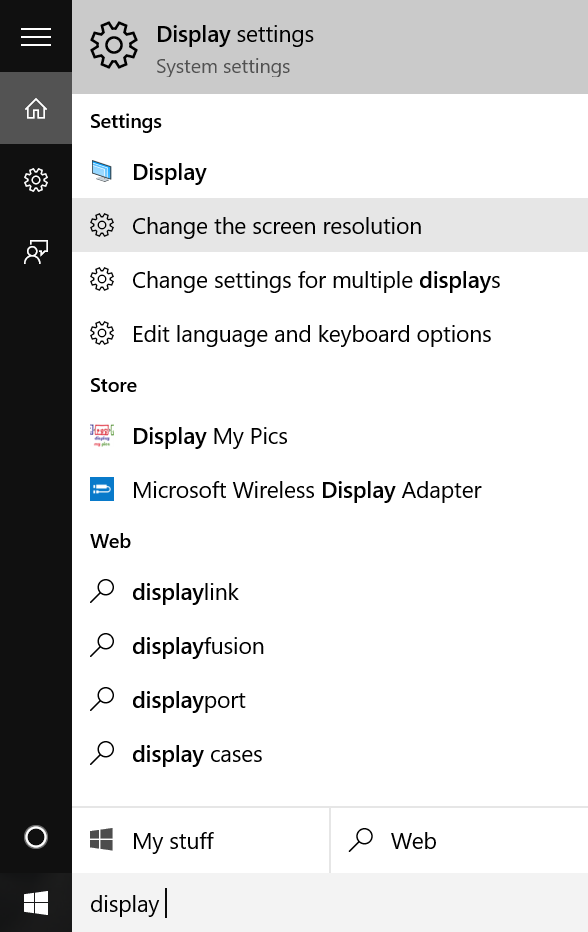
- Click on the Windows Logo or press [WINDOWS] key once, type in: Resolution.
Select: Change the screen resolution
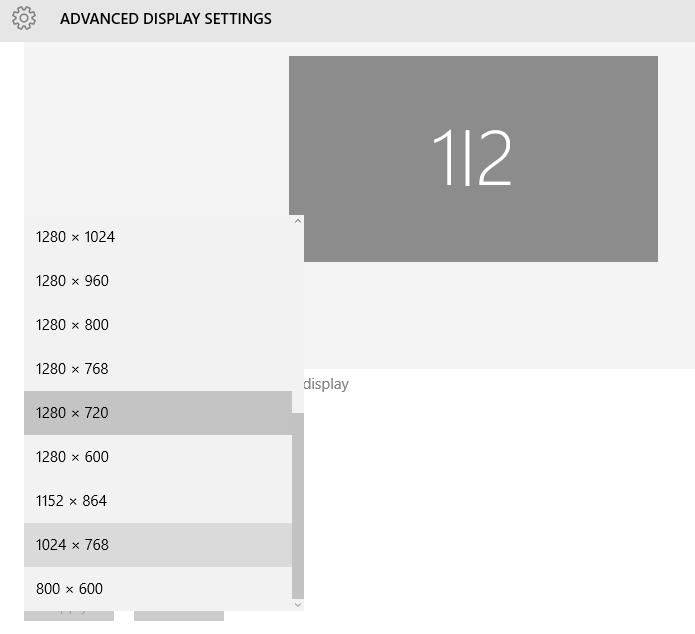
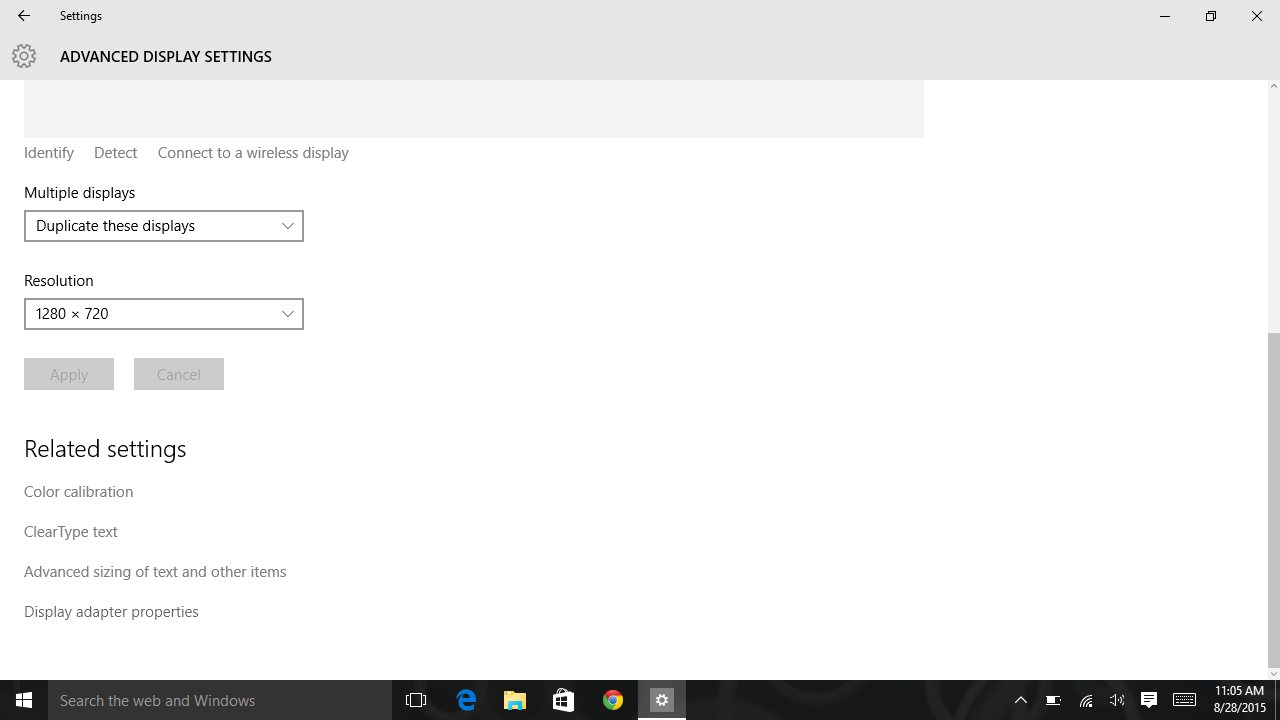
- Under the Resolution section, select the preferred resolution:
- HDMI: 1280 x 720 @ 60Hz
- VGA: 1024 x 768 @ 60Hz
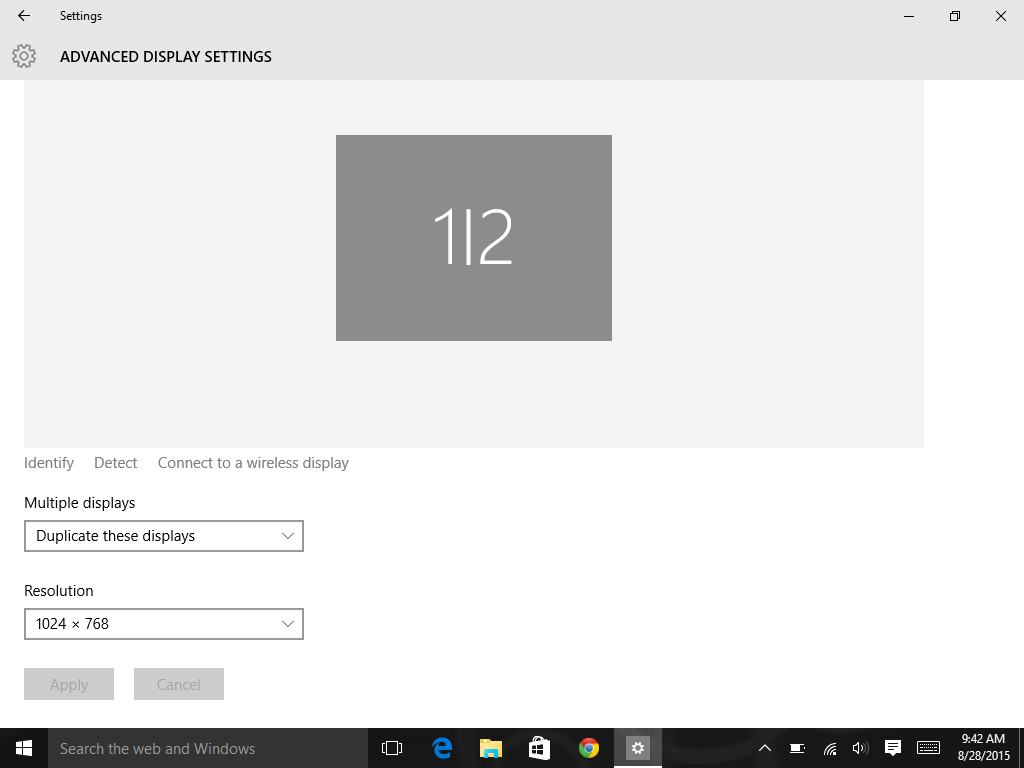 
- Click Apply. Your screen should temporary turn black or blue, and comes back with correct resolution for the projector.
Your laptop should remember this setting from now on and you don't have to do this all the time when you are in the classroom, unless you regularly connect another device with very different resolution requirement (ie. Your HD TV at home). |
| |
|
Change Refresh Rate
|
|
If your projected image looks like it's covered with horizontal lines, you might need to change refresh rate:
- Click on the Windows Logo or press [WINDOWS] key once, type in: Display.
- Select Change the screen resolution.
- Scroll down to the bottom of the window and click Display adapter properties, another window will pop up.
- Select Monitor tab, and change Screen refresh rate to: 60 Hertz.
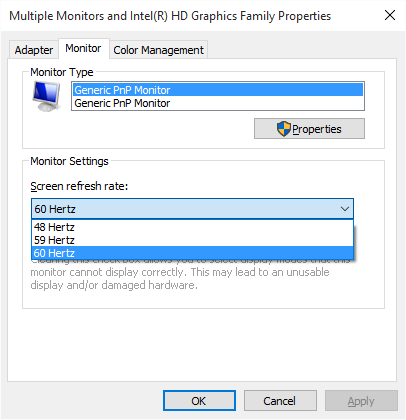
- Click OK to commit to the change.
|
| |
| If you are having difficulties following the instruction on this page or needing additional assistance, please contact the Classroom Technology Service team and schedule a one-on-one Equipment Consultation. For all other general questions and feedback, you can email directly to etssupport@berkeley.edu. |